
Folding Bikes Blog
Stories, tutorials, and advice from the Montague Bikes team.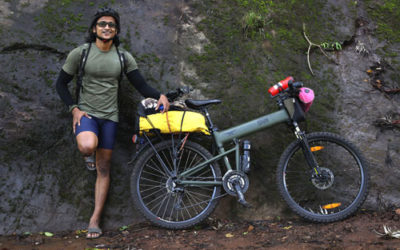
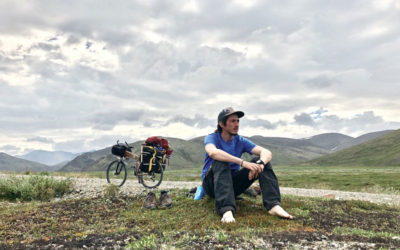
Bikepacking Southern India with Sreejith
Sreejith is a Paratrooper rider from Kerala, the southern state of India. He is a former animator turned Crossfit trainer and adventure travel enthusiast. He's been kind enough to provide us with a guest post about his experiences with his Paratrooper and bikepacking...
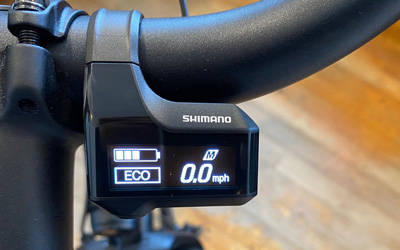
Shimano STEPS E-Bikes: How to Customize Settings
The Shimano STEPS electric bike drive system offers a variety of settings that can be customized using the Shimano E-Tube mobile app. Here you will learn how to change these settings to get the most out of your STEPS equipped e-bike. For basic information on how to...
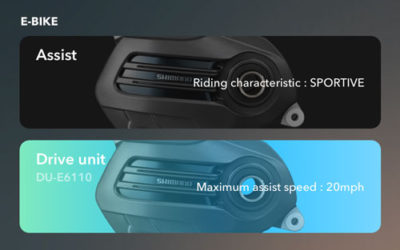
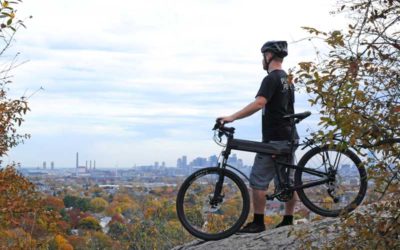
Shimano STEPS E-Bikes: How to Operate and Update
Montague's newest e-bike, the M-E1, comes equipped with a Shimano STEPS E6100 mid-drive system to provide pedal assistance. Pedelecs like the M-E1 provide a boost to your pedaling input with an electric motor. In the case of a mid-drive, that motor is integrated...

Montague Bikes Art
Our marketing team along with fans of Montague bikes all over the world are always creating fun and interesting graphics with our bikes. These pop up on social media from time to time and in our book, they're art! We compiled our favorites here so you can browse the...
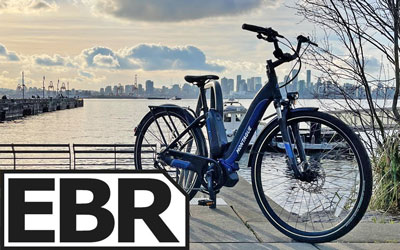
M-E1 Review from ElectricBikeReview.com
ElectricBikeReview.com is the premier source for e-bike reviews on the web. They just published a comprehensive overview of the all new Montague M-E1 e-bike. Watch the video review as they go in depth on all the details - from drive unit specs to folding system...
A Note on COVID-19 and Social Distancing by Bike
Like so many of you, much of the Montague staff is working remotely for the foreseeable future. As the situation with COVID-19 evolves, we're taking every measure possible to keep each other safe. While that includes staying away from public spaces and practicing...

Paratrooper Scale Models from TomyTec in Japan
TomyTec in Japan is a maker of realistic scale models, beloved by collectors all over the world. As part of their Little Armory series, which includes 1/12th scale models of military and anime figurines, they approached Montague Bikes with interest in the...
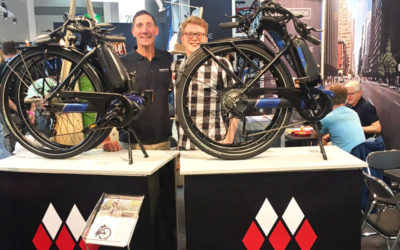
Eurobike 2019: M-E1 E-bike Sneak Preview
The 28th edition of Eurobike, the world's largest bicycle trade show, took place last week in Friedrichshafen, Germany. Montague Bikes joined manufacturers from all over the world to exhibit their latest products to international distributors, product managers, and...
Sailing the World with Montague – Scotland to the Caribbean
For the last year, Neill Hogarth and his partner Heidi have been living out their dream of sailing the world. Last April, they set out from Scotland in Artemis, a 36 foot Rustler sailing yacht equipped with everything they would need to live — including two...
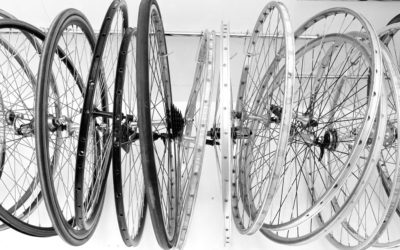
Bicycle Wheel Sizes Explained
There are a wide variety of wheel sizes available on bicycles today, and if you explore folding bikes, recumbents, and other specialty bikes you'll discover even more. Why are there so many options? Why are there so many names for the same sizes? How do you know...
Bikepacking Eastern Russia on the Paratrooper Pro
Timur Akhmetov is a perennial traveler, nature photographer, and Montague rider. He has spent the better part of his adult life exploring the wilderness of eastern Russia, by bike, by foot, and by kayak. Through his camera lens he manages to capture the ruggedness and...
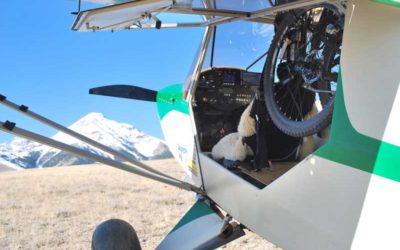
Rans Aircraft and the Paratrooper Pro: Perfect Partners
Tom Simko has been a Montague rider for years, owning multiple bike models that have all been carried with him in his small kit-plane, a RANS S-7. He provides a guest post today about flying with his Paratrooper Pro! I am on my third Montague, currently a Paratrooper...
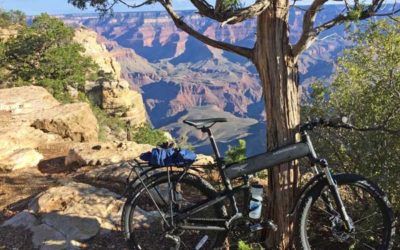
Exploring the Grand Canyon with a Montague and an RV
For the last year, Ed Elliott has been exploring the national parks of the United States with his motor-home and trusty Paratrooper Pro. His most recent trip took him through Moab Utah and Grand Canyon National Park in Arizona where he was able to put the Paratrooper...
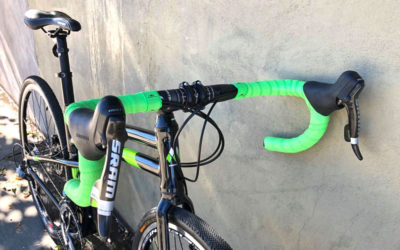
Custom FIT from Freedom Folding Bikes
Freedom Folding Bikes in Boulder, Colorado has been supplying the front range with Montague's high performance folding bikes and creating some incredible custom builds in the process. You may remember the fully custom Paratrooper equipped for bikepacking that was...
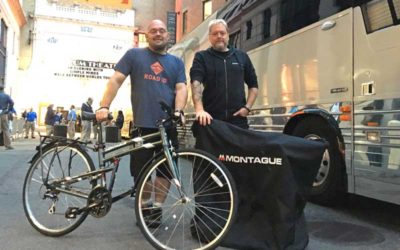
Montague Bikes on Tour with Simple Minds
If you were to put together a list of the greatest bands to come out of Scotland, Glasgow's Simple Minds undoubtedly deserve a spot near the top. Formed in 1977, they've had five number one songs on the UK Album Charts and sold an estimated 70 million albums. American...
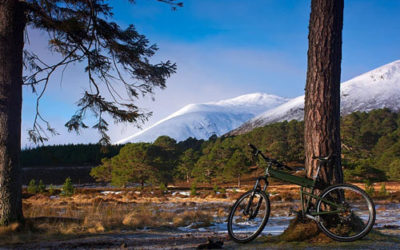
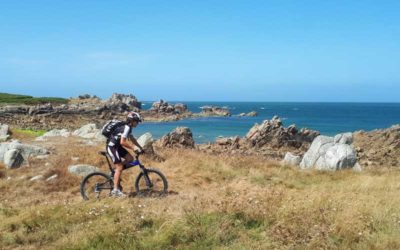
Scottish Highlands Nature Photography on the Paratrooper
Mark Nesbitt lives in Perthshire, Scotland and spends his free time exploring the Scottish Highlands, camping, and photographing the beautiful countryside. His trusty companion on many of his nature expeditions is his Montague Paratrooper, a capable off-road mountain...
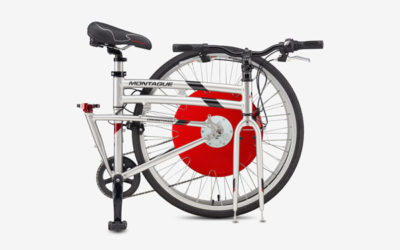
Copenhagen Wheel Montague E-Bikes Now Available
If you're looking for a high performance folding e-bike, Montague is now offering the Crosstown and Boston equipped with the Copenhagen Wheel hub motor from fellow Cambridge, MA based Superpedestrian. The future of urban transportation is here. A 350 Watt...
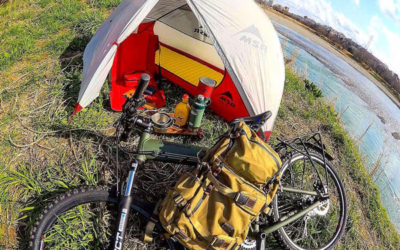
Camping in Japan (But Not Roughing It) with the Paratrooper
Montague owner Joe (@jawsjc7 on Instagram) spends his days camping and exploring the outdoors of his home country of Japan. Sometimes this takes him to remote mountain sites where he packs light and travels by bike or canoe. Often it's a far more elaborate affair,...