If you own an electric bike with a Shimano STEPS drive system, there are two mobile apps that allow you to connect with your e-bike from your smartphone. We covered the Shimano E-Tube Project app in an earlier post, which allows you customize settings on the bike’s drive unit. Today we’ll talk about the E-Tube RIDE app, which allows you to map and visualize your rides, view real time data, and log and track metrics. Think of it like an advanced cycle computer, and all the necessary sensors to collect data are already integrated with your bike. If you’re considering a new e-bike, the STEPS equipped Montague M-E1 is the world’s first full-size performance folding e-bike, delivering premium ride quality while folding in seconds for the car trunk, train, or closet.
The first step is downloading the E-Tube RIDE app which is available for both iOS and Android. You can find links on the Shimano website, or download it in the Google Play Store or Apple App Store by searching “E-Tube Ride”.
The following instructions show the process on iOS. If you’re using an Android device, the prompts and process may vary slightly. Once you’ve installed the E-Tube Ride app, ensure that Bluetooth is enabled on your mobile device in order to connect to your bike.
Connecting to Your E-Bike
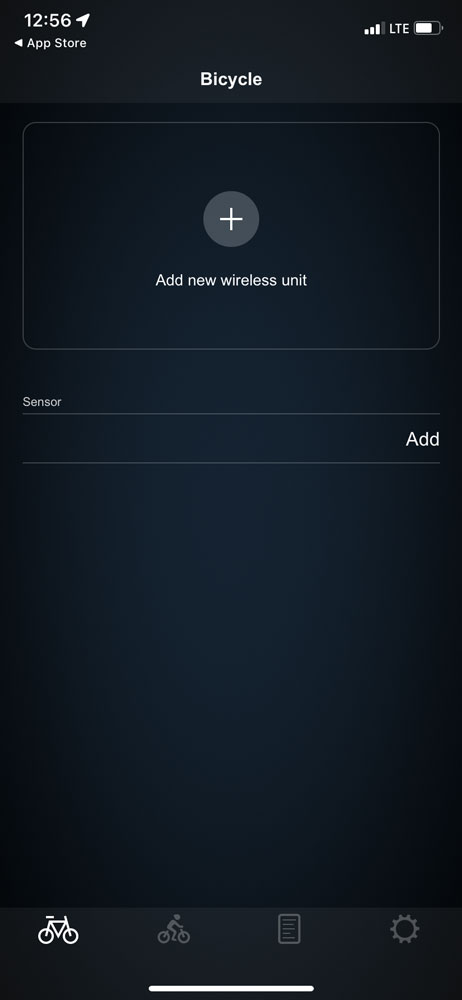
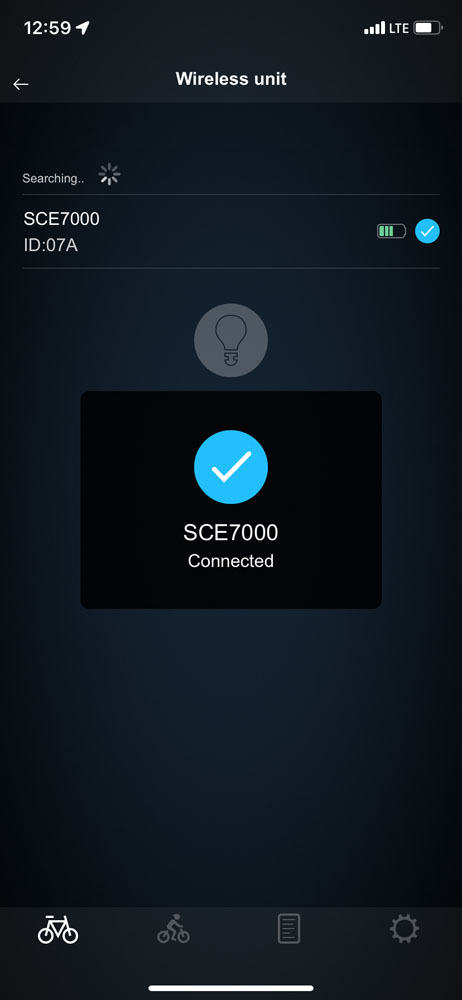
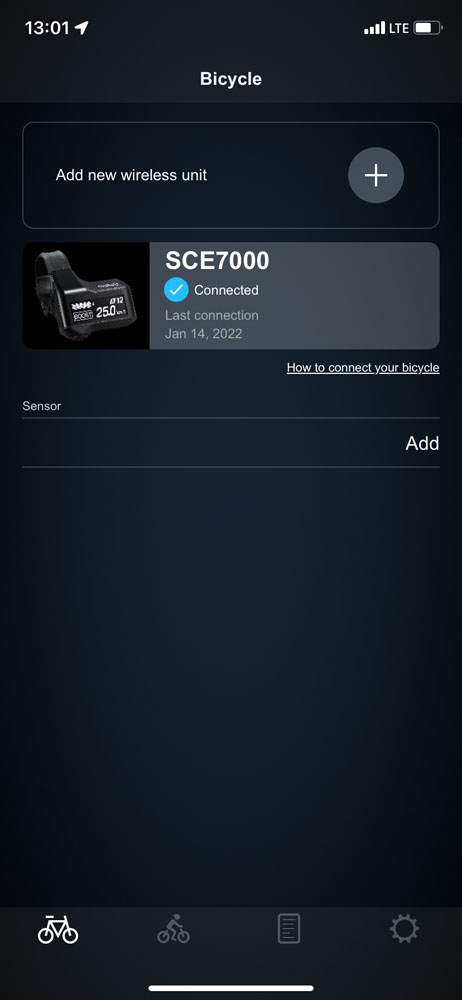
The four buttons across the bottom of the app allow you to toggle between the available screens. The first screen which displays by default upon opening the app, allows you to manage connections to your e-bike and additional sensors if you have them. Tap the plus sign above “Add new wireless unit” and your phone will search for nearby Shimano STEPS e-bikes via Bluetooth.
In the example above, our bike shows up as “SCE7000” (it uses a 7000 series display). Tap the name of your bike and the app should connect automatically and return to the previous screen where your bike’s drive unit will be shown as “Connected”. In the future, bikes you’ve previously connected with will be saved here, and if one is found nearby when you open the app, it will connect automatically.
Real Time Ride Data
The second icon in the bottom menu opens the real-time ride data view. Most Shimano STEPS systems have a built-in screen on the handlebars that can show some of the same information, but the app can display several metrics at once in an easier to read and customizable layout, and allow you to log the data for later review. The best way to utilize this view is with a phone mount for your handlebars. There are several options out there, from simple clamps to rubber mounts that stretch around your phone, and even systems that lock into a purpose built phone case. Just be sure to get one that holds your phone securely!
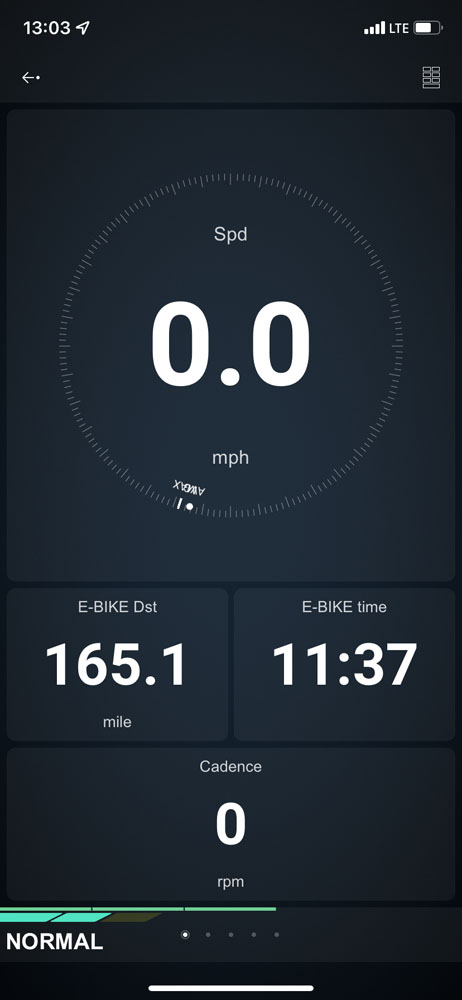
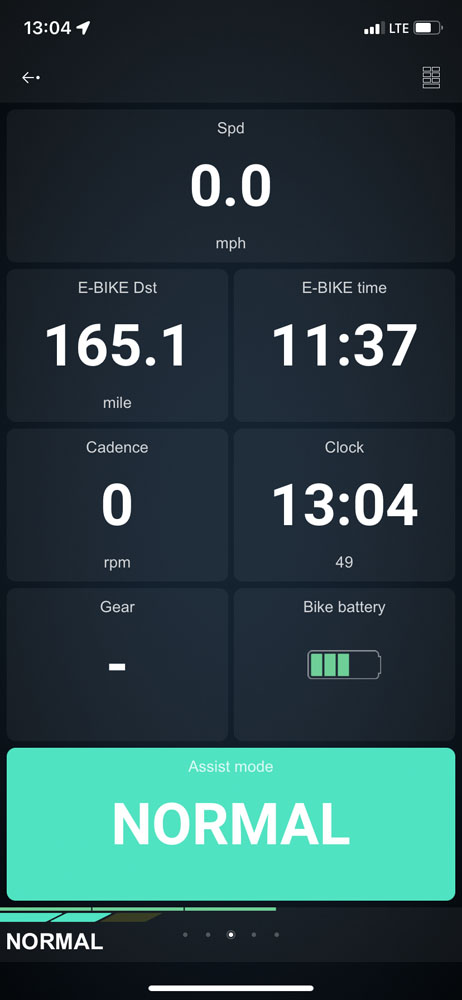
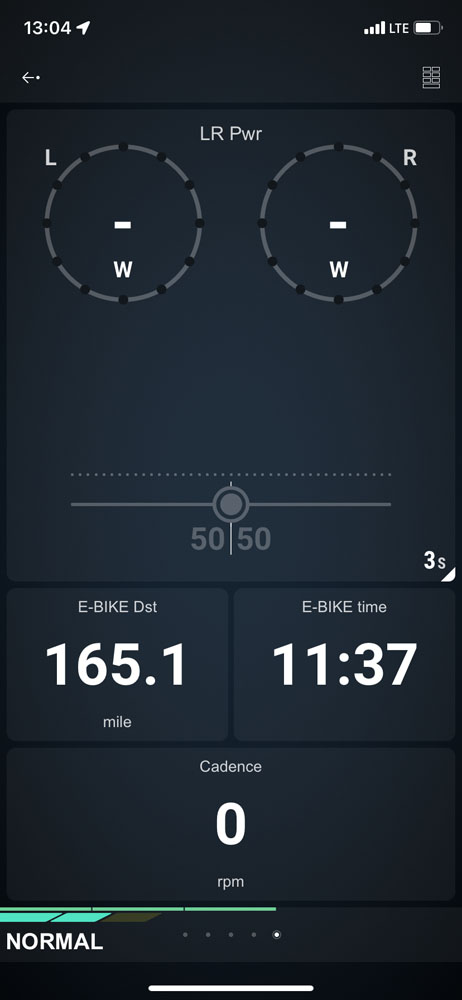
There are several default layouts which you can toggle between by swiping left and right. Each one has a different number of panels on the screen, and each panel can be customized to show the information you choose. These range from a simple 4 panel layout up to 9 panels of data. The current mode of the drive system is also displayed along the bottom of the screen (OFF, ECO, NORMAL, or HIGH).
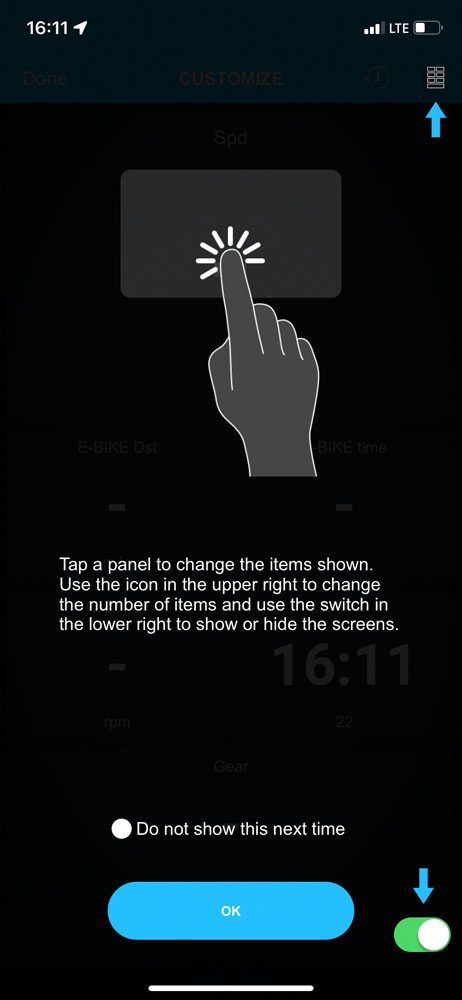
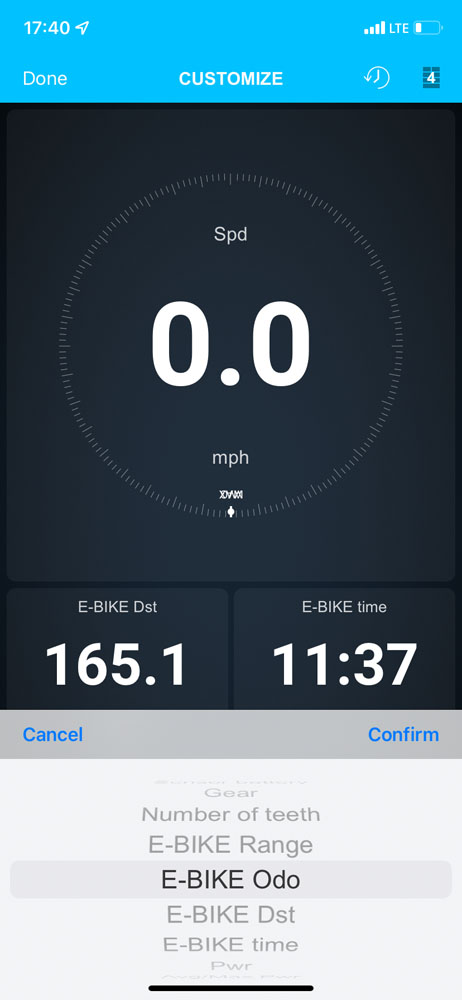
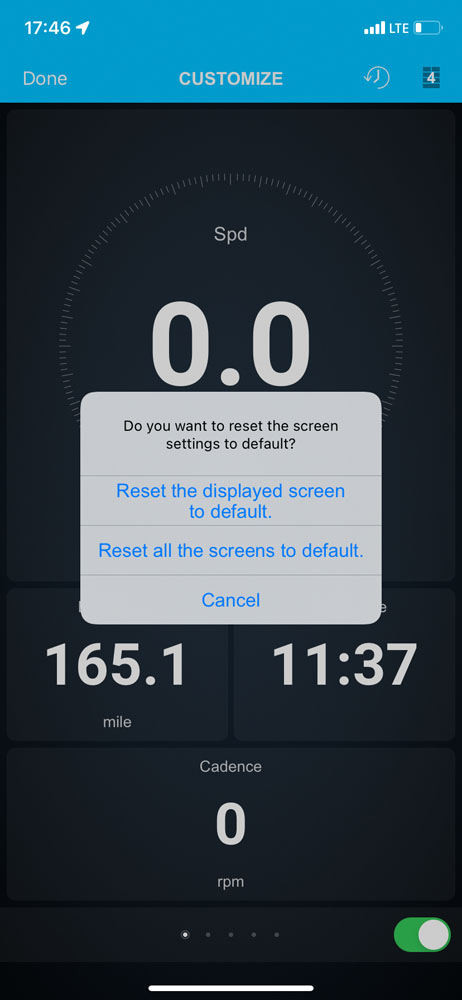
Tapping the panels icon in the upper right corner will enable editing the layout that is currently visible. Tap OK and you will enter Customize mode. Tapping that same panels icon in the upper right corner again will allow you to change the number of panels on the current view, cycling between 4, 6, 8, or 9 panels. Tapping directly on a panel will allow you to select the metric that is displayed there, including:
- Start logging (Displays a button to begin a new trip)
- Spd (Current speed)
- Dst (Distance of current trip)
- Riding time (of current trip)
- Avg/Max Spd (Average / Maximum Speed of current trip. Tap to toggle between)
- Cadence
- Avg/Max Cadence (Average / Maximum Cadence of current trip. Tap to toggle between)
- Clock
- Bike battery (Displays current battery % charge)
- Shifter battery (Only applicable if your bike uses electronic shifting)
- Sensor battery
- Gear (Only applicable if your bike uses electronic shifting)
- Number of teeth (Only applicable if your bike uses electronic shifting)
- E-BIKE Range (Estimated range based on current assist level)
- E-BIKE Odo (Odometer displays total distance traveled by the e-bike)
- E-BIKE Dst
- E-BIKE time
- Pwr (Rider power output)
- Avg/Max Pwr (Average / Maximum rider power output during current trip)
- LR Pwr (Rider power output for Left and Right pedal)
- Ped Eff (Pedal Efficiency displays % power applied to L/R pedal)
- Assist mode
- Assist profile
- Light
- Shift mode (Only applicable if your bike uses electronic shifting)
Tapping the Clock/Rewind icon in the upper right corner will reset the layout to the default view. You can choose to reset only the current layout you are viewing, or all layouts.
While in Customize view, a toggle will also appear in the bottom right corner of the screen, which allows you to toggle that particular layout ON or OFF. When toggled OFF, the layout will be hidden when you are no longer in the Customize view.
Register / Login with Shimano ID
Many features of the Shimano E-Tube RIDE app are only accessible once you are logged in with a Shimano ID. This includes the ride mapping and logging functions. Luckily, you can easily register entirely within the app, or login with your existing social media accounts, Google login, or Apple ID.
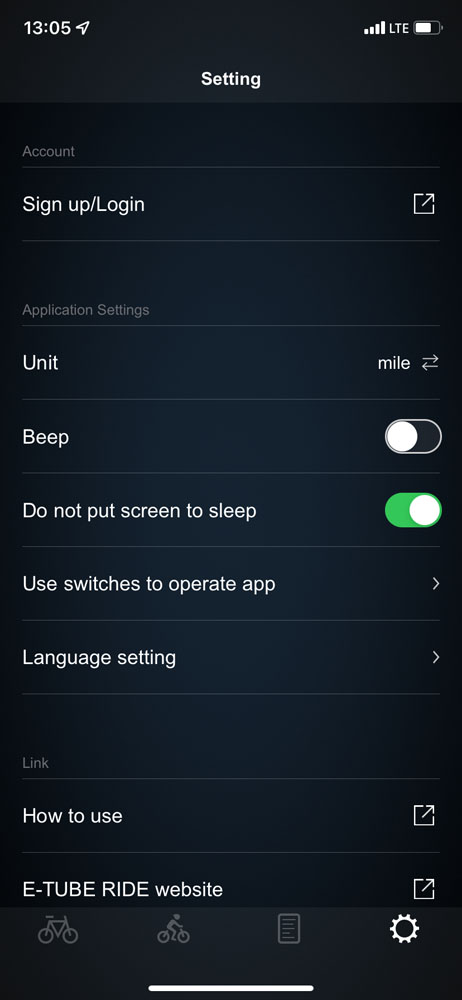
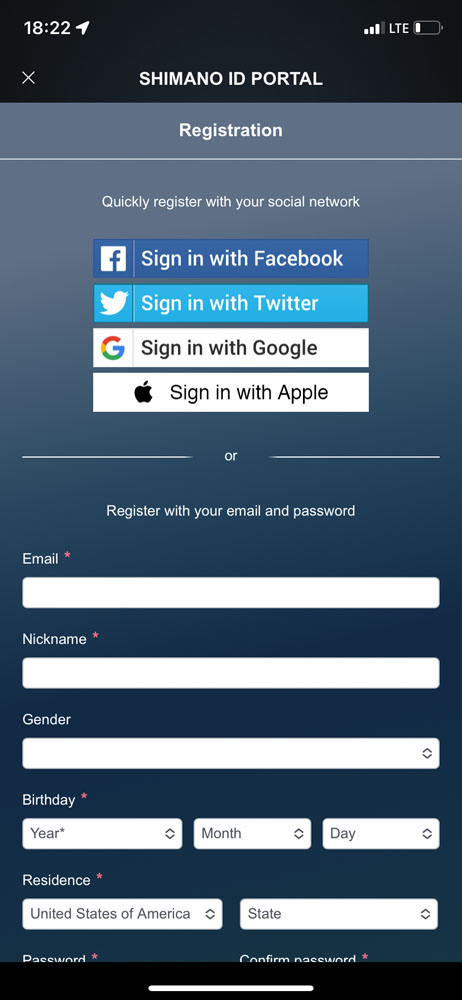
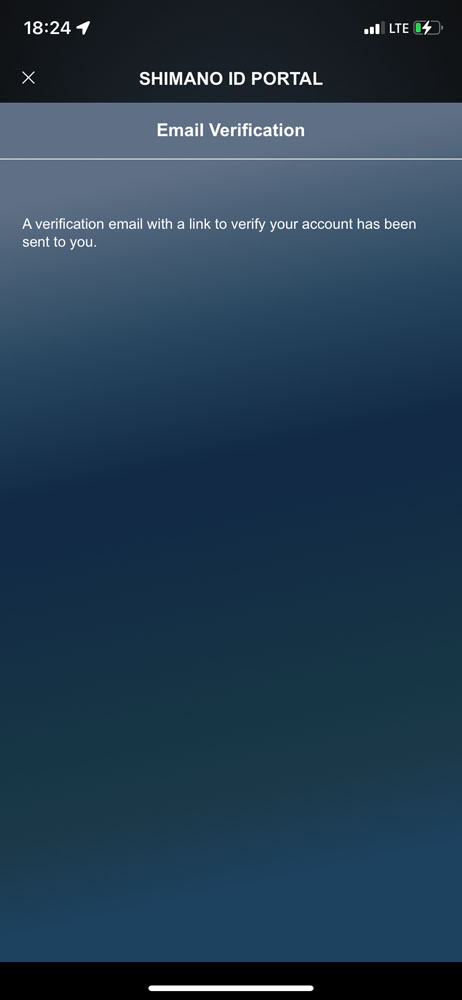
Begin by tapping the Gear icon in the bottom menu (farthest to the right) which will open the Settings menu. Tap “Sign up/Login” and you can either select an existing 3rd party account to login with (Facebook, Twitter, Google, or Apple), or enter your email and info about yourself to register. If you register with your email, Shimano will send a verification email with a link to verify your account.
You have a few additional options in the settings menu as well, such as switching the units between miles and kilometers, toggling on/off sounds (Beep), toggling on/off screen sleep, and changing the language of the app. Below those settings you’ll find links to Shimano’s help documents and the E-Tube RIDE website.
Ride Planning and Mapping
When logged in, the “Ride” view (second button along the bottom menu) will have an additional map screen available where you can plan your routes. You can access it by swiping all the way to the left-most screen. Here you can search for destinations, drop pins to plan a multi-stop trip, and even download maps for use offline.
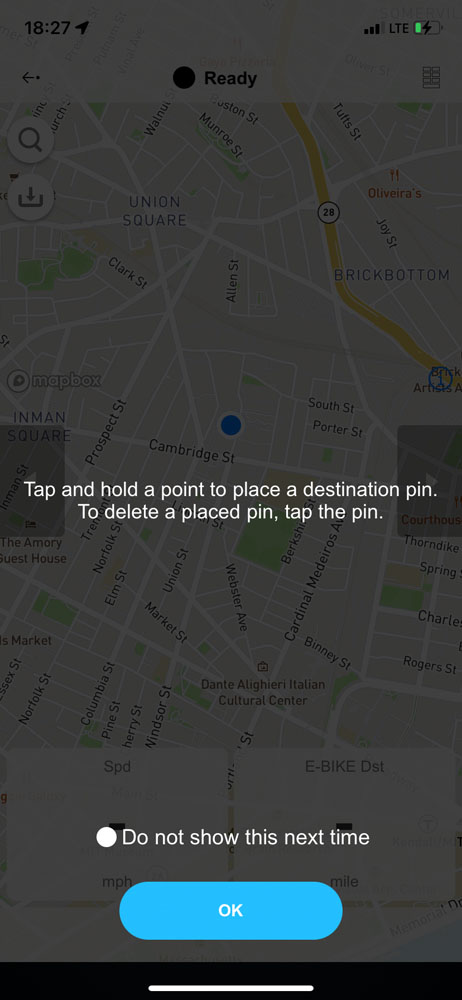
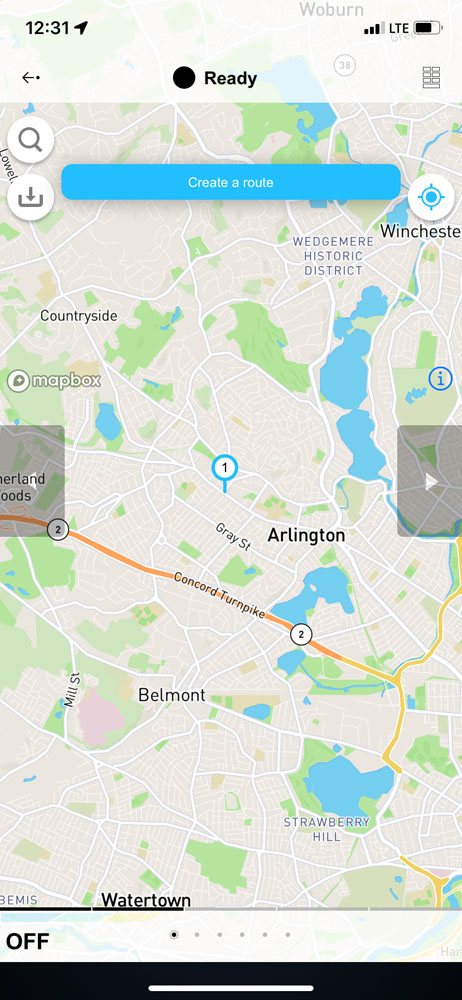
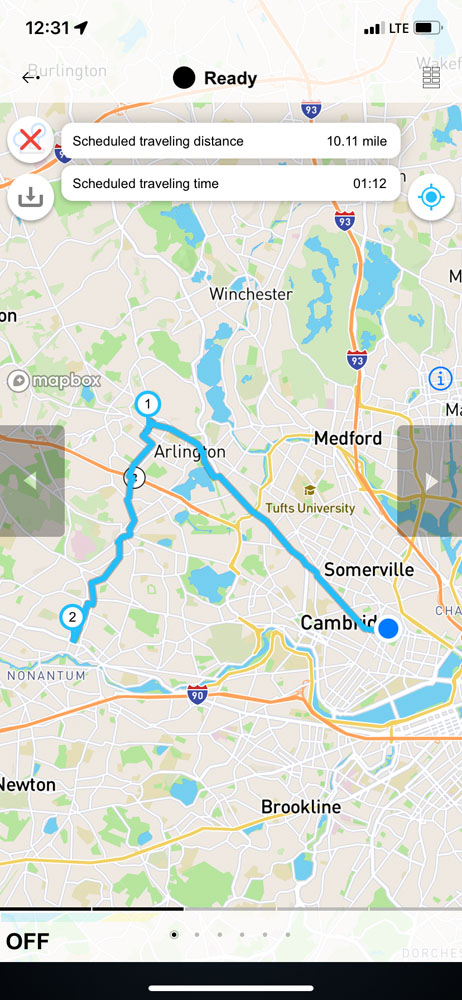
The basic functions of navigating the map will be familiar to users of other map apps, where swiping on the map will move the view, pinching will zoom, and rotating with two fingers will rotate the view. In order to plan a route, you’ll need to set a destination by dropping a pin. This is done by tapping and holding on the map. You can drop as many pins as you’d like, which will act as anchor points for the route (effectively stops along the way). The pins are numbered in the order you add them to the map, which will determine their order on the route. You can also use the search icon in the upper left corner to find destinations by searching by address or name of place.
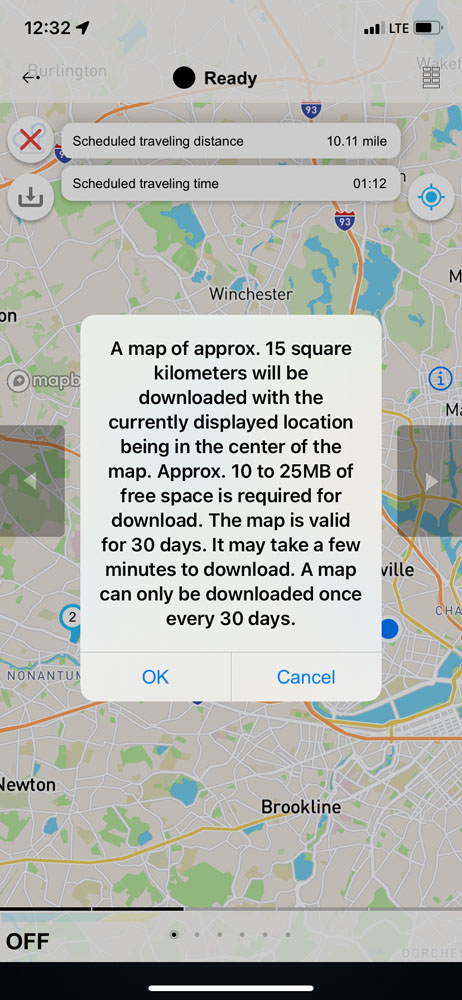
Once you have your pin(s) placed, tap the “Create a route” button at the top of your screen, and the suggested route will be calculated and displayed in blue. The ride distance and estimated travel time will also be shown along the top of the screen. A red “X” now appears in the upper left corner which will cancel the current route, and below that is a download button which will save the map and route for viewing offline. This is especially useful if you’ll be riding in an area with limited cell service.
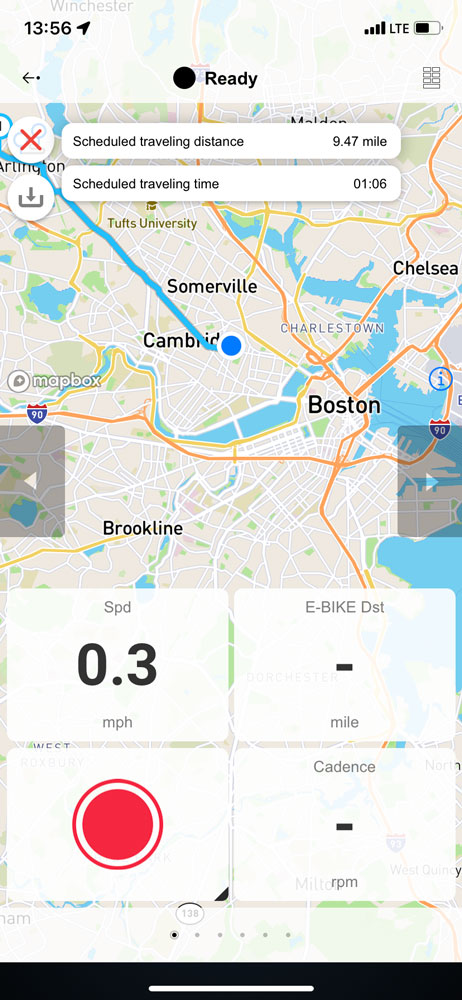
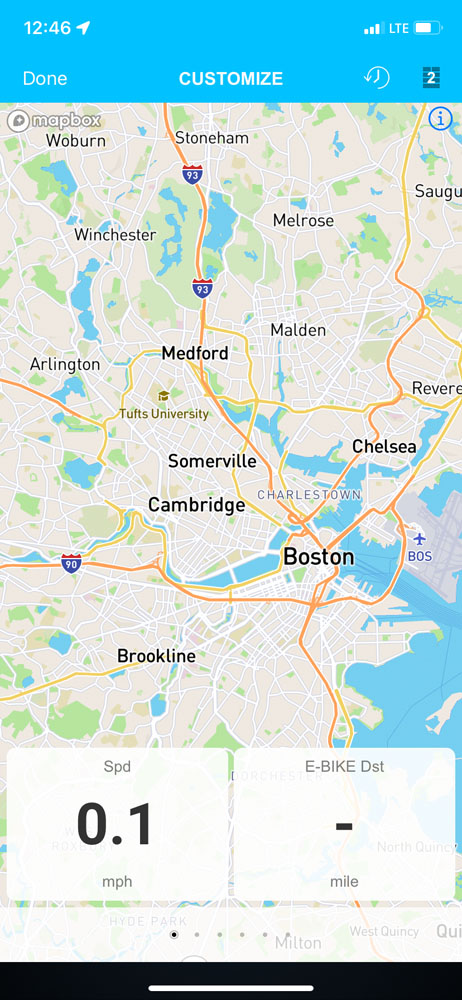
The map screen can display the same panels used on the other ride view screens in order to show real-time ride data while you use the map for navigation. These panels are only visible when you are in “tracking mode”, which positions your current location in the center of the screen. Enable tracking mode by tapping the round crosshair button in the upper right corner of the screen.
You can edit these content blocks in the same way as well, by tapping the panels button in the upper right. Tapping the panels button again will set the number of panels, and tapping the panels themselves will allow you to select what is displayed there. If you plan to log your rides, we find it useful to keep the “Start logging” button visible here so you don’t need to switch screens in order to start, pause, or stop your ride.
Next time: Logging and Analyzing Rides + Shimano Connect Lab
In our next post, we’ll explore logging and reviewing your rides, and connecting with other services like Shimano Connect Lab or Strava in order to analyze your rides in greater detail. Stay tuned!
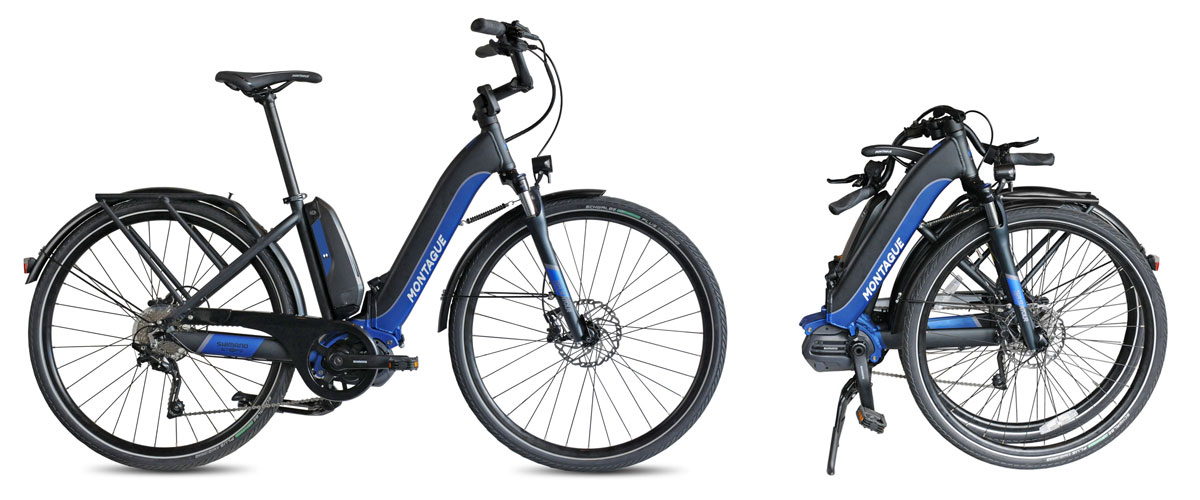
Montague M-E1
The Montague M-E1 is the world’s first full-size performance foldable e-bike. A revolutionary new e-bike designed for both urban riding and trekking, the M-E1 folds in seconds with a single quick release.

