Any bike with multiple chainrings uses a front derailleur to shift between them. In order to get smooth, accurate shifting, and avoid chain rub, it’s important to have your front derailleur properly adjusted. There are a few adjustments that can be made to the derailleur, and with the right tools you can do this maintenance yourself. Making these adjustments is easiest if you have access to a bike stand where you can turn the pedals, and shift freely while the bike is stationary.
The first thing you want to check, is the position of the derailleur itself. A clamp-on derailleur can be both moved up and down, and rotated on the seat tube. To check the height, shift the chain to the largest, outermost chainring. (If it won’t shift to the largest chainring, other adjustments are necessary but eyeball the height for now). The bottom of the derailleur cage should sit 1-2mm above the teeth of the large chainring.
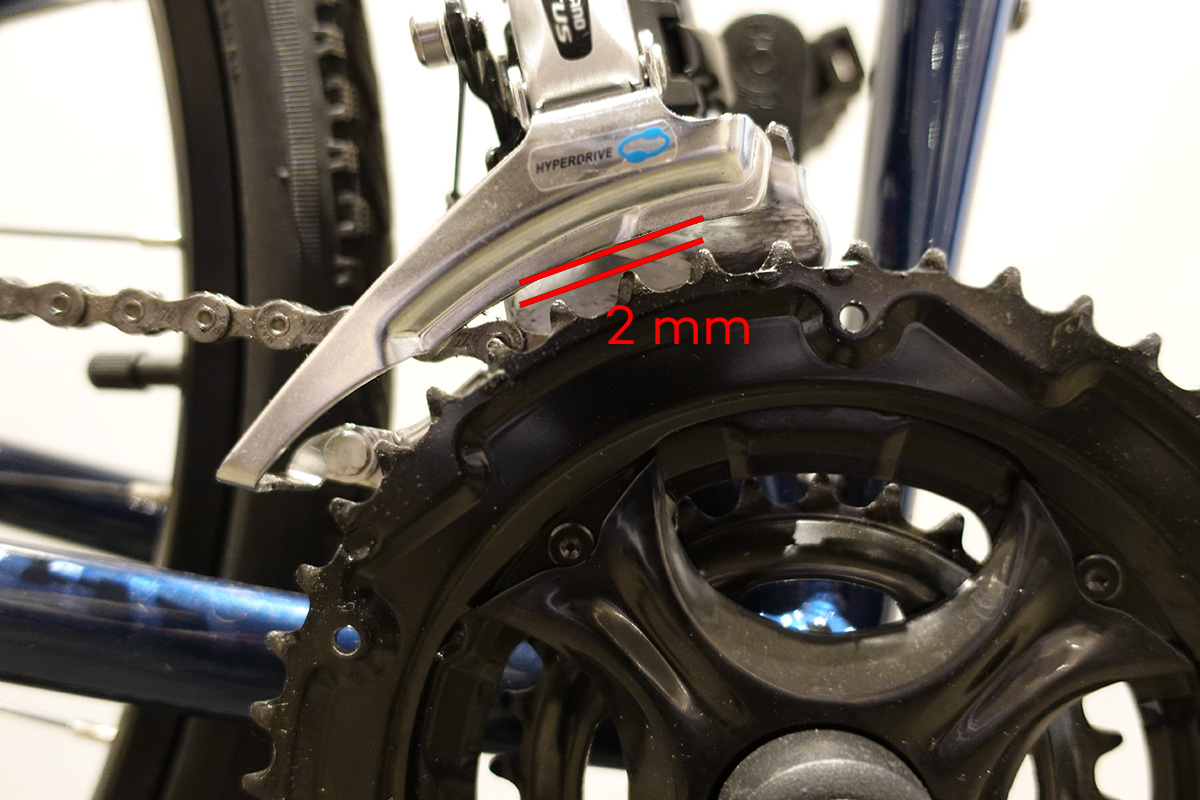
If the height needs adjusting, shift down to the smallest chainring to release cable tension. Loosen the clamp holding the derailleur to the seat tube, which likely requires a 5mm allen key, and it should be free to slide.
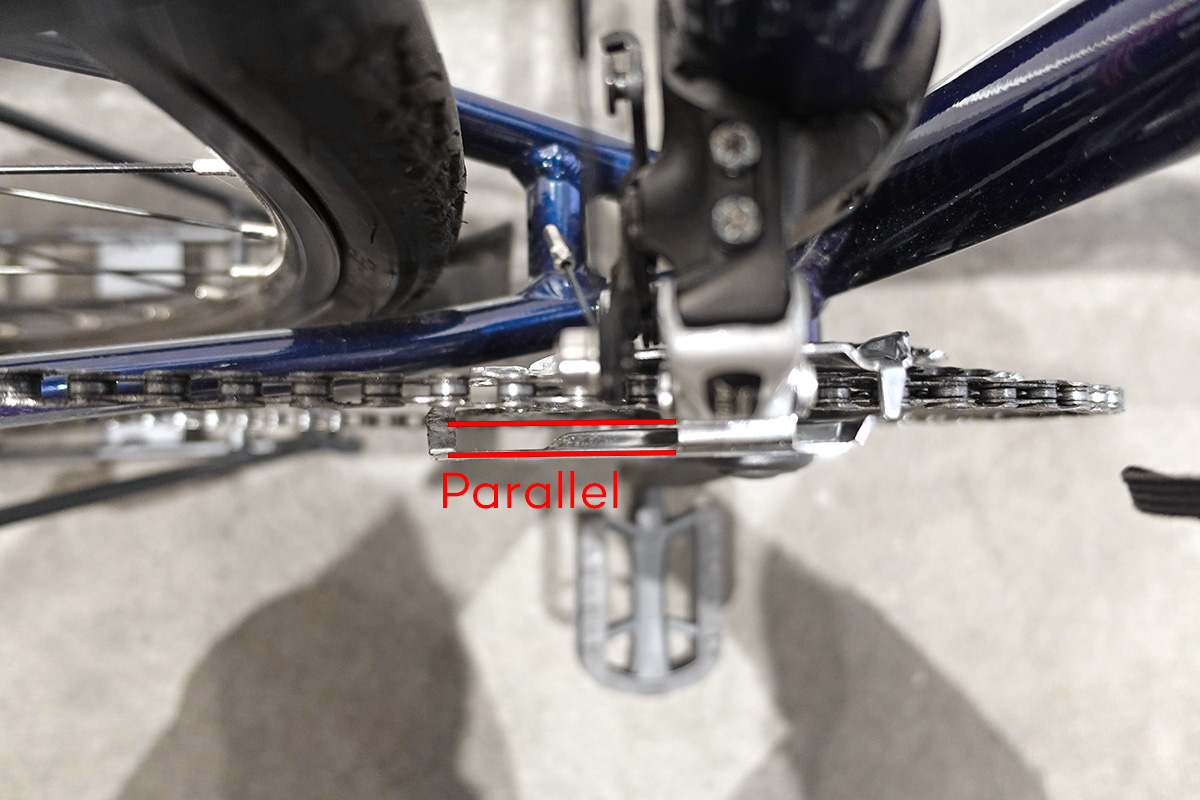
You’ll also want to check if the derailleur is parallel to the chainrings. Shift back to the largest chainring, and sight it from above. Compare the outer edge of the derailleur to the chainring. If they are not parallel, adjust accordingly by again shifting to the small chainring to release cable tension, and loosening the clamp.
Limit Screws:
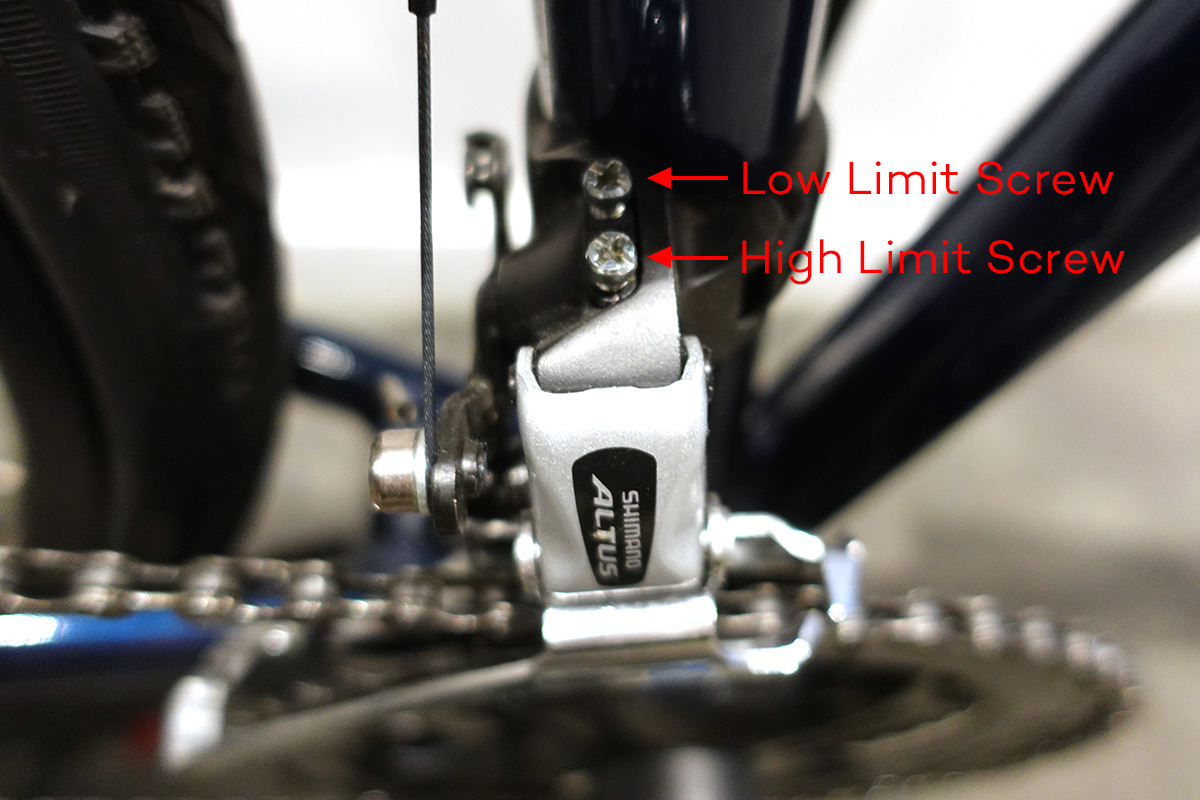
Front derailleurs have 2 screws known as limit screws, marked with an L and an H. The Low limit screw determines how far the derailleur can move in toward the small chainring. The H limit screw controls how far the derailleur can move outward toward the large chainring.
Low Limit Screw
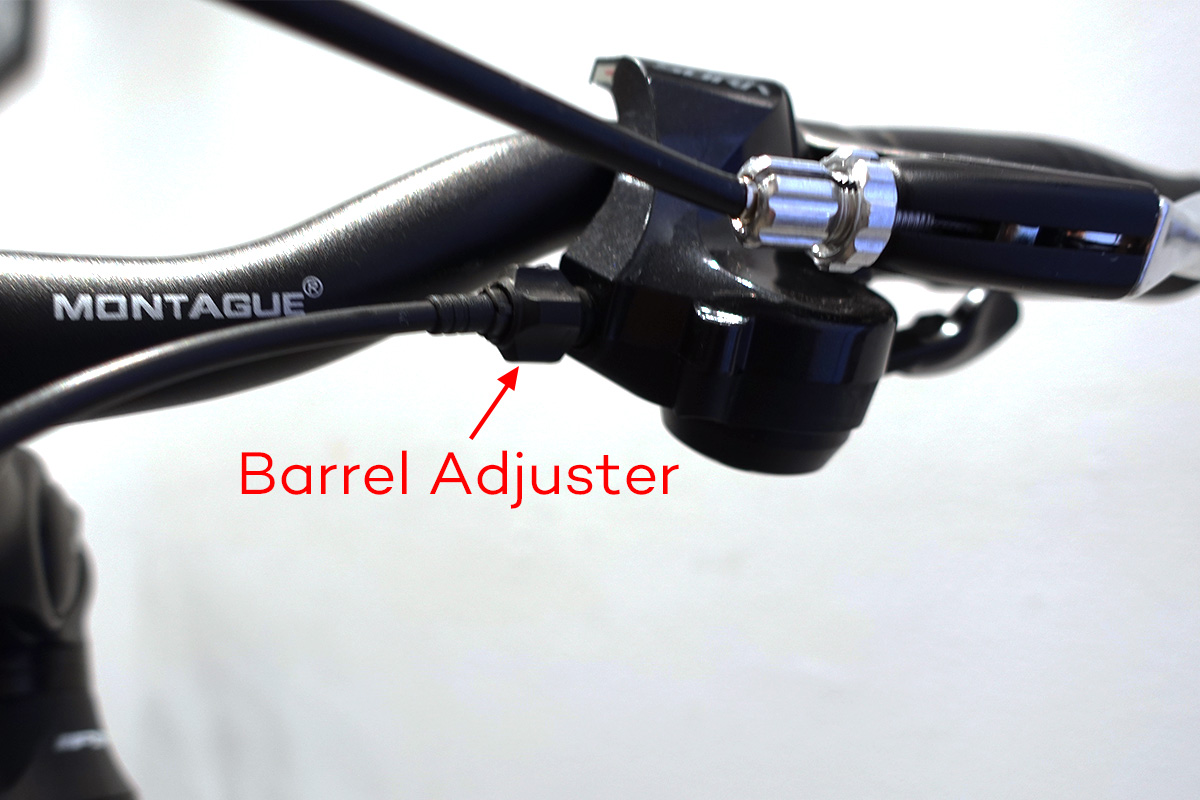
When adjusted properly, the L screw allows the chain to move down to the smallest chainring, but not far enough that it could push the chain off the inside of the ring. Shift the chain to the innermost chainring and the innermost sprocket in the rear. Check the tension on the cable coming directly up from the derailleur, it should be fairly loose in this position. If it’s tight, turn the barrel adjuster on the shifter clockwise. The barrel adjuster is located where the cable housing enters the shifter (on the handlebars):
When resting on the small chainring, without tension on the cable, there should be only about 1 mm of space between the chain and the inner cage of the derailleur:
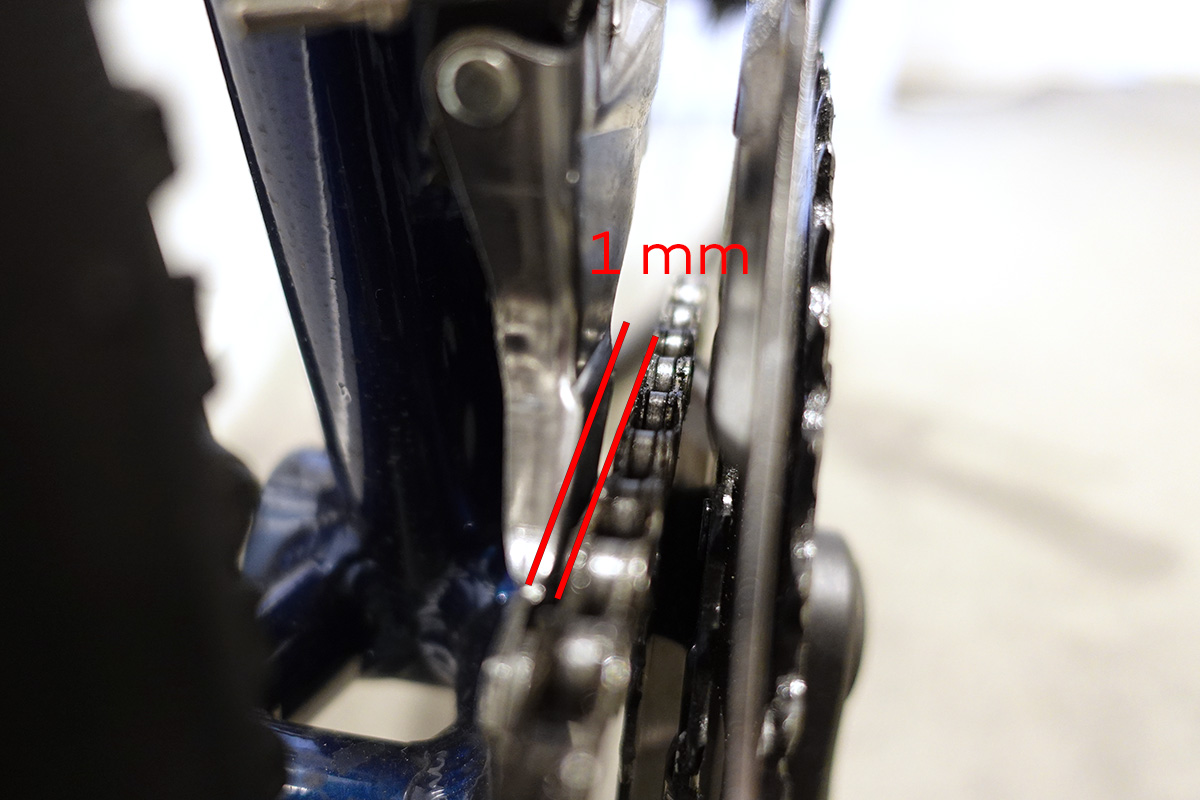
Loosening the L screw (counter-clockwise turn) will allow the derailleur to move in more, increasing this space. Tightening the L screw (clockwise turn) will push the derailleur out, decreasing the space. Turn the cranks a full rotation to be sure the chain doesn’t rub at any point (the ring may not be perfectly straight).
High Limit Screw
When properly adjusted, the H screw allows the derailleur to shift to the outer chainring, but stops it before it can push the chain off the edge. Shift the chain to the outermost ring in the front, and the outermost sprocket in the rear.
IMPORTANT: Keep pressure on the shift lever while sighting the derailleur, to ensure it is out against the H screw. In this position, there should be a 1 mm gap between the chain and the outer cage of the derailleur:
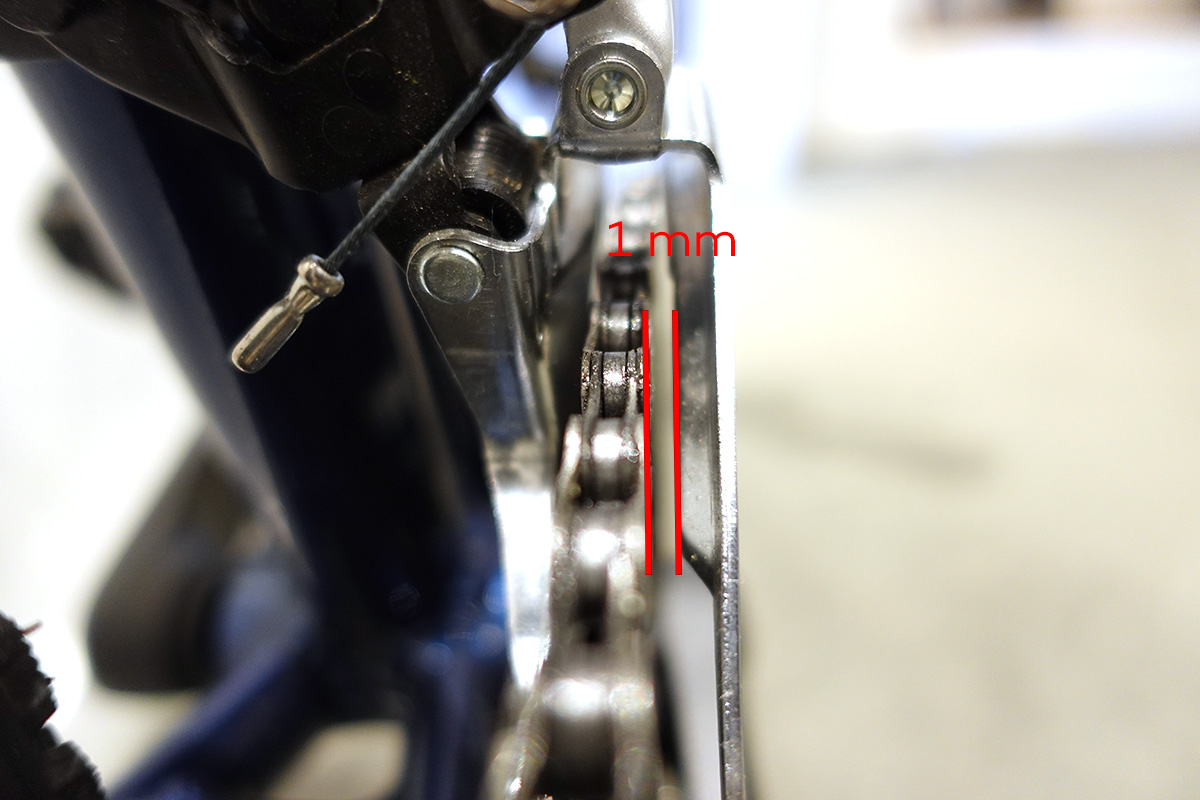
Loosening the H screw (counter-clockwise) will allow the derailleur to move out farther, and increase the gap. Tightening it (clockwise) will move the derailleur in and decrease the gap. Once set, turn the cranks to ensure it does not rub at any point in the revolution.
Cable Tension (Adjust Indexing)
The final part of the front derailleur adjustment is setting the cable tension. If you recall, it should be fairly loose in the rested, inner chainring position. When you shift to the larger rings, the derailleur is literally pulled by the cable. If the cable is too loose to start, it can’t pull far enough to get to that next ring, or will rub the chain while in that middle position.
Shift the chain to the middle ring in the front, and the innermost sprocket in the rear. This will allow us to make sure the chain won’t rub, even when your chosen gear creates a chain angle. There should be about 1 mm between the chain and the inner cage of the derailleur. Essentially, you want that inner side of the cage as close to the chain as possible without rubbing.
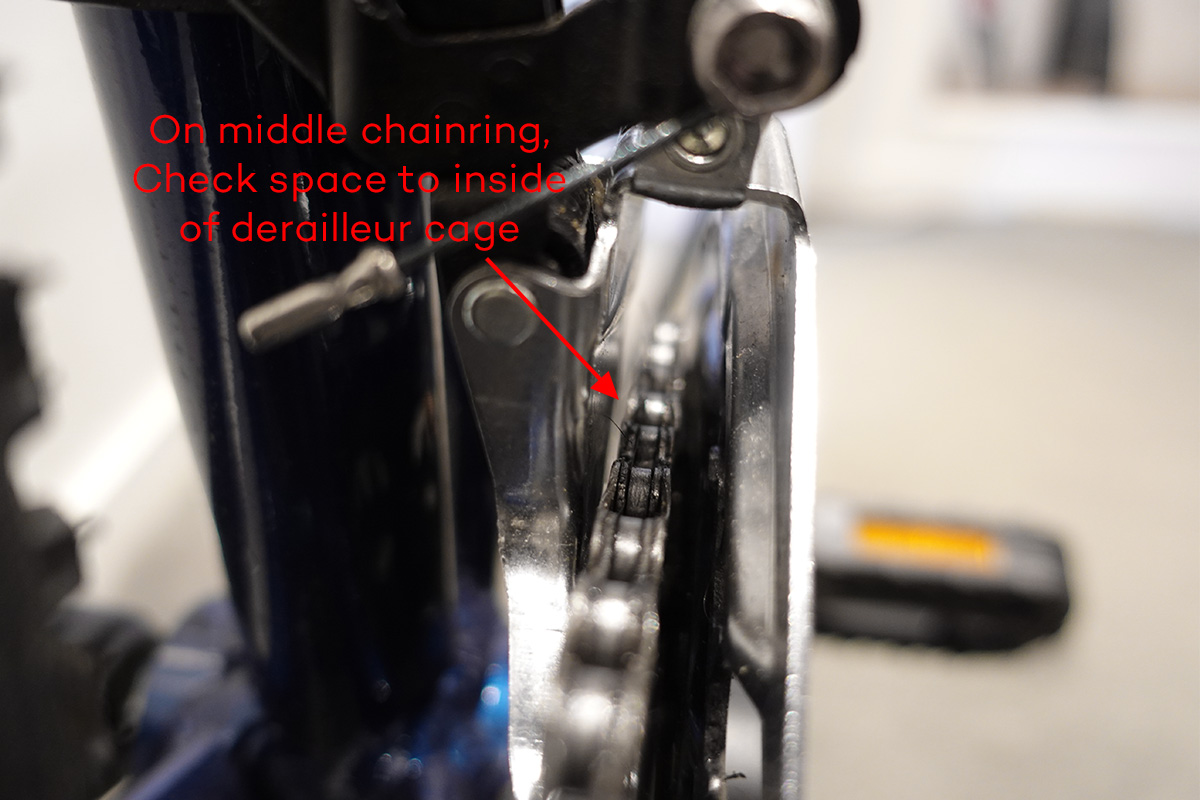
If there is a large gap, or the derailleur didn’t move far enough to push the chain to the middle ring, increase cable tension by turning the barrel adjuster on the shifter, counter-clockwise.
If the chain is rubbing the inside edge of the cage, turn the barrel adjuster clockwise to loosen the cable tension.
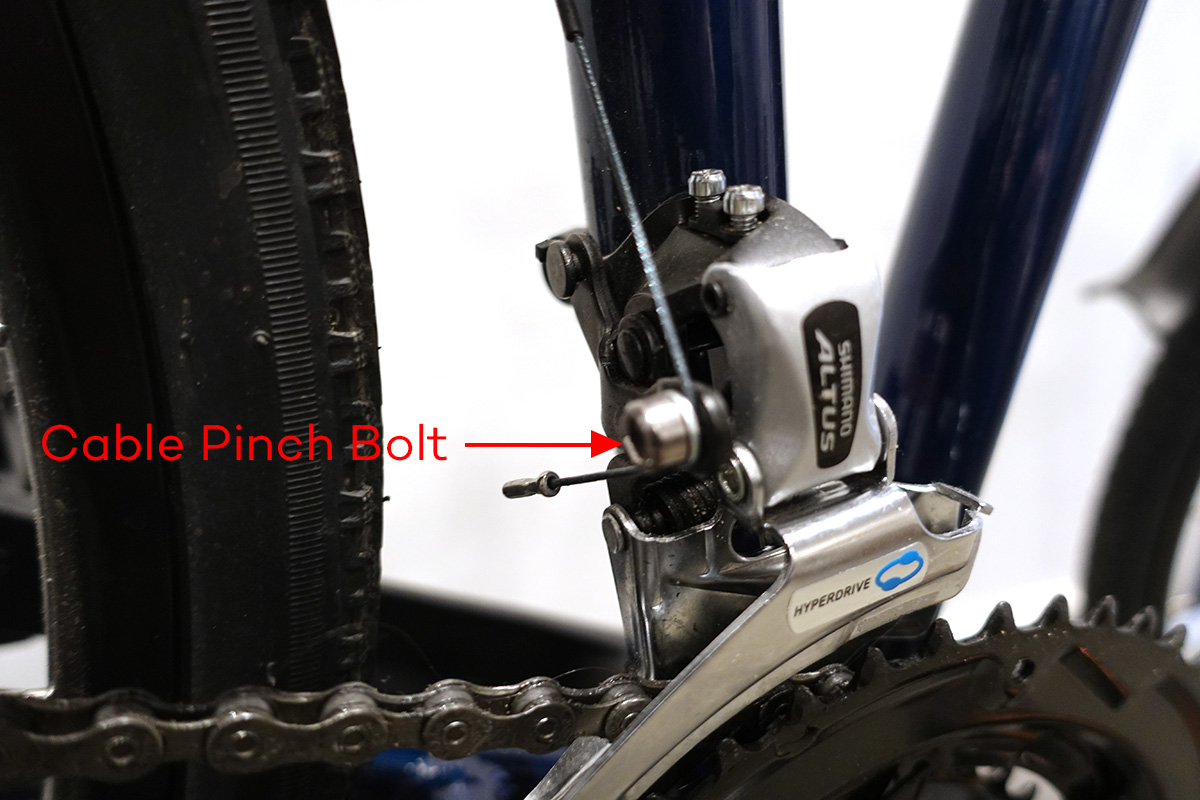
If the barrel adjuster is turned all the way in or out, and more adjustment is necessary, you can reset the barrel adjuster by loosening the cable from the pinch bolt on the derailleur itself. Shift to the smallest chain ring, loosen the pinch bolt holding the cable, turn the barrel adjuster back in or out according to the need, and retighten the pinch bolt.
The true test of course, is how well it shifts. The measurements here are suggestions for optimal shifting. For example, with your particular bike you might need more than 1 mm gap to the outer cage when setting your H screw just to get it to shift to the large chainring. That’s ok! If you’re unsure about any of your work, be sure to consult a professional bike mechanic.


Thanks for posting this. I ran through it on my bike today and it got my shifting back in line. I can never remember which screw does what.
I’m so unmechanical that this is beyond me but that is completely my fault, not yours. In fact this information is so brilliantly and thoughtfully set out that I just wanted to compliment you on it, after which I’m off down the bike shop. Rare in my experience to see something so helpful, clearly designed with user in mind at every step.
Great article thanks
off to shed
Thanks for the article.
After struggling with front Derailleur Adjustment and consulting innumerable articles and Youtube videos I just about gave up until I discovered one additional factor in proper derailleur shifting, Crank Bolt Tension.
While inspecting my bike, I noticed a very slight “play” and a new “sound” during a ride. I realized that the crank was a little loose.
When I tightened the crank bolt, I realized it was way looser than the manufacturers torque specs. Once I tightened the crank bolt, it brought the outside chain ring a little closer in, enough to make a significant difference in the range of the derailleur.
Hope this helps.
Some front derailleur models do not have height or rotation adjustments. These models mount on a plate and both height and rotation settings are preset. Additionally, some bikes have a bracket commonly referred to as a “braze-on” for front derailleur mounting. This bracket will allow limited height and rotational settings.
Limit screws stop the inward and outward travel of the front derailleur cage. Limit screws are marked “L” and “H.” The L-screw will stop the motion of the derailleur toward the smallest chainring. The H-screw will stop the motion of the derailleur toward the largest chainring.
when replacing a cable, i’m struggling to get the correct tension to start the process. For example, should I:
a) big rear and small front rings
b) fully loosen high and low screws
c) tighten the shifter adjuster all the way – clockwise
d) pull the wire and clamp — this is where I struggle — not too tight but ensure I can use the barrel adjuster to tighten as necessary
Then continue with the process you describe. Does this sound correct or should I start this process another way? Basically, I think I need to adjust the tension via the clamp bolt to really start this process and I can’t seem to get this right. Too loose and I can’t get the derailer all the way to the big ring. To get to this point, I feel my derailer needs to be very tight at the starting point.
What is the band clamp size for the Front Derailleur on the Montague Bikes?
Front derailleur clamp size is 34.9mm on all Montague bikes.
There are times that your bike derailleur is damaged, which prevents the bike gears from shifting. The way to fix bike gears that won’t shift: You should locate your bike derailleurs accurately. Bike derailleurs are responsible for shifting the bike gear and keeping the bike chain in place. To determine the shifting problem, you can determine whether your bike won’t shift to the highest gear front. Identify the cables that lead to the derailleurs and look for the adjusters. Rotate the cable adjuster anticlockwise if you observe that shifting is difficult while lowering the gear, keep the adjuster tight. Ensure that the derailleur shifts successfully in every turn of the gear wheel.
I recently upgraded components on my bike, which included of the Bafang motor, New chain ring from Luna and 11 speed cassette. I’ve been experiencing difficulty with my chain that I have not found a cure for. The chain tends to ride up on top of the gears at your regular intervals. I have a picture and would post if possible. I was originally told that the chain would have to seat itself overtime but after 150 miles, I’m still getting this problem. Any thoughts?